6. Working with Git
Git is able to be used to import/export all workflows and atomic actions.
6.1. Exporting to Git
In the workflow workspace you can select a git repository to commit to.
- Use the “Commit” button at the top of the page.

- Provide a file name and a commit message.
- Use the load new version button to switch to any version of the workflow saved on Git.
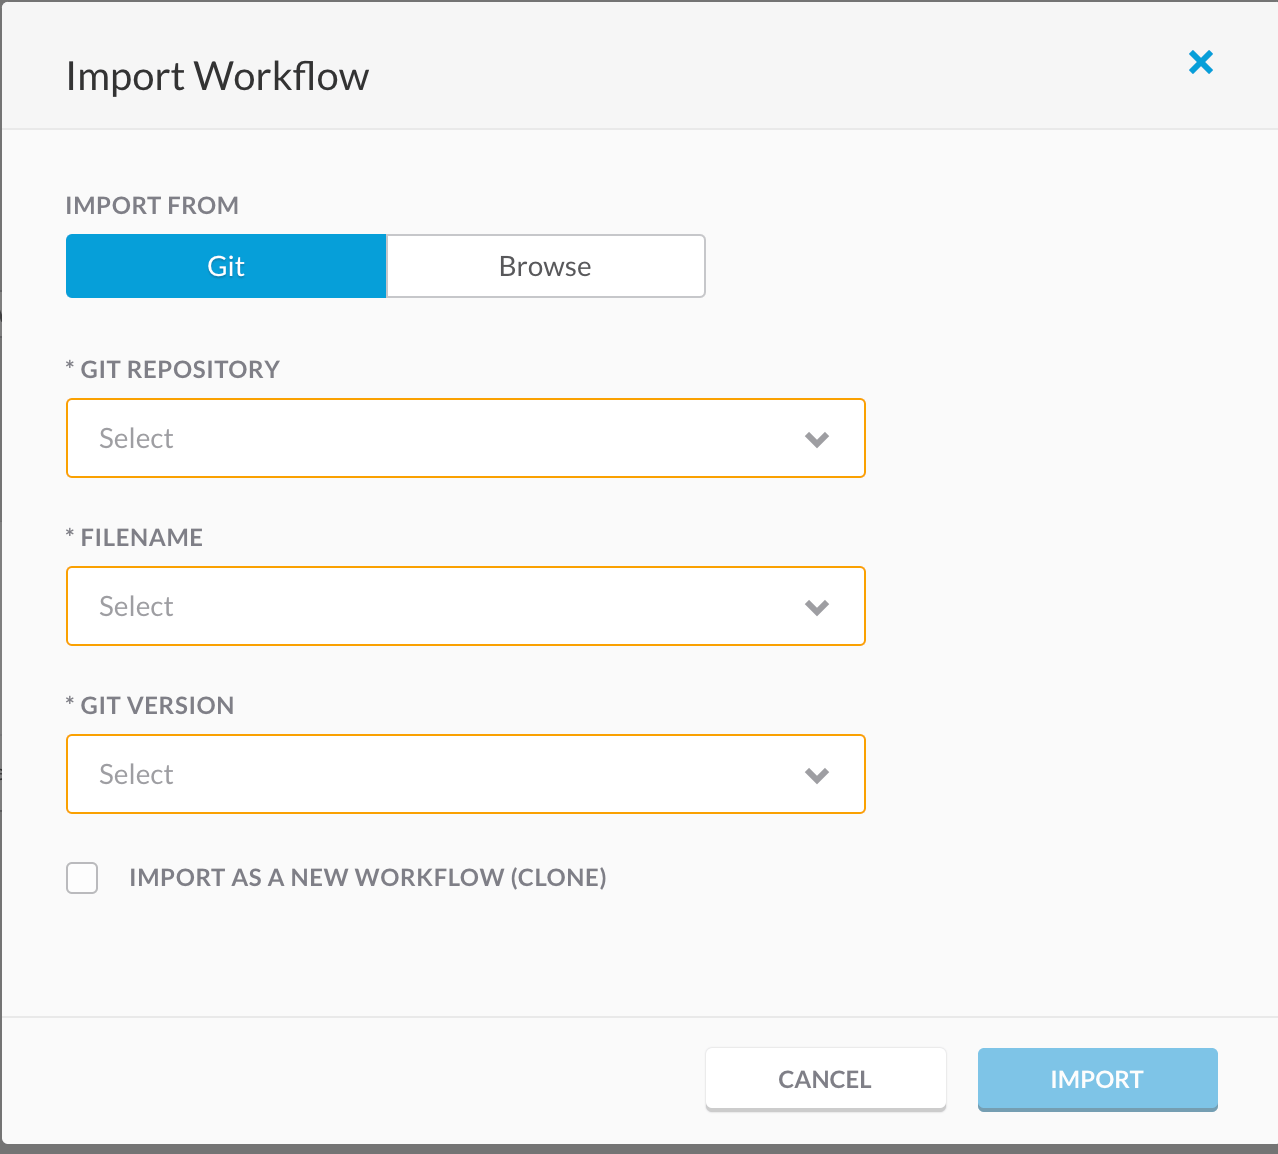
6.2. Importing from Git
- Go to “My Workflows”.
- Select the import button and choose a Git repository, filename, and version to import a workflow.
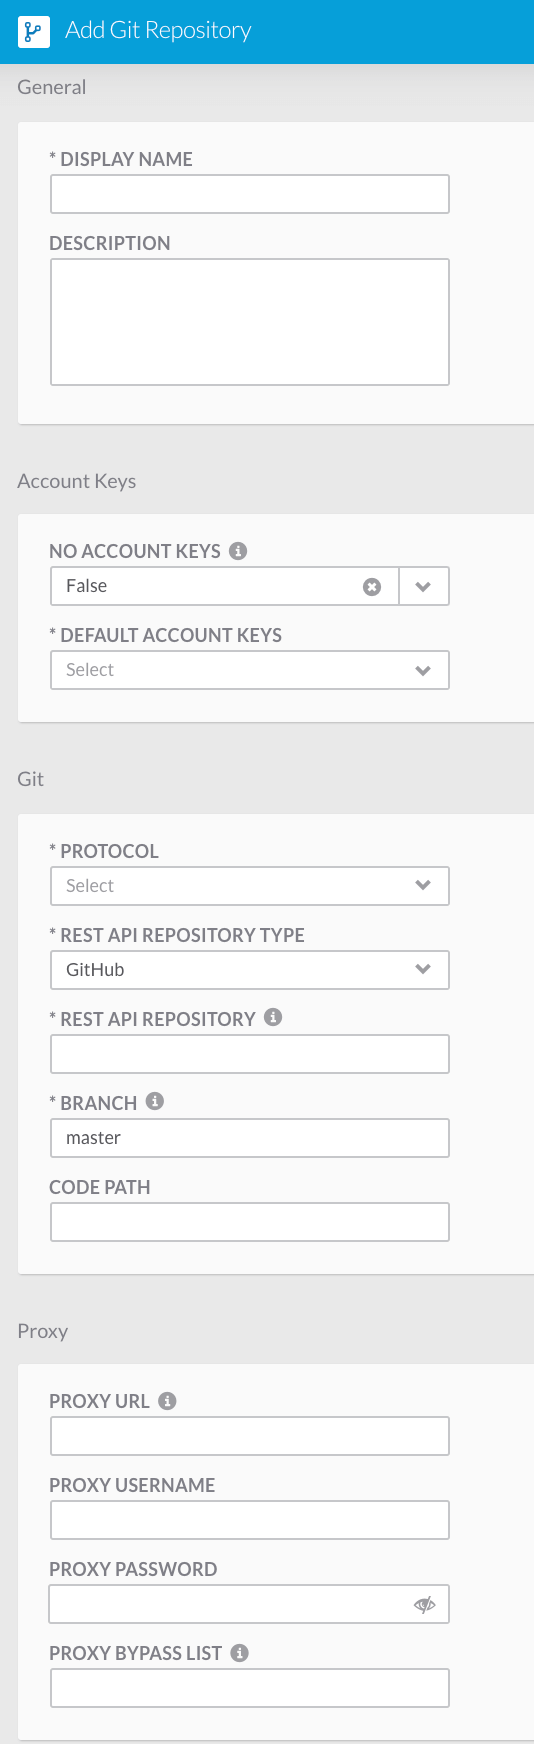
6.3. Adding a Git Repository
- Got to “Admin” and then “Git Repositories” to set up all the Git repositories.
- To add a new repository click “New Git Repository”.

- Provide a name, description, and if you want to provides account keys.
- Do Git setup by choosing what protocol to use, the Rest API repository type, the Rest API repository, the branch, and the code path.
- Once everything is filled in click the “Submit” button.