2. Workflows
Workflows are built with Atomic Actions and they act as lego pieces to create workflows.
2.1. Workflows
2.1.1. Creating a New Workflow
- Select the “New Workflow” button.
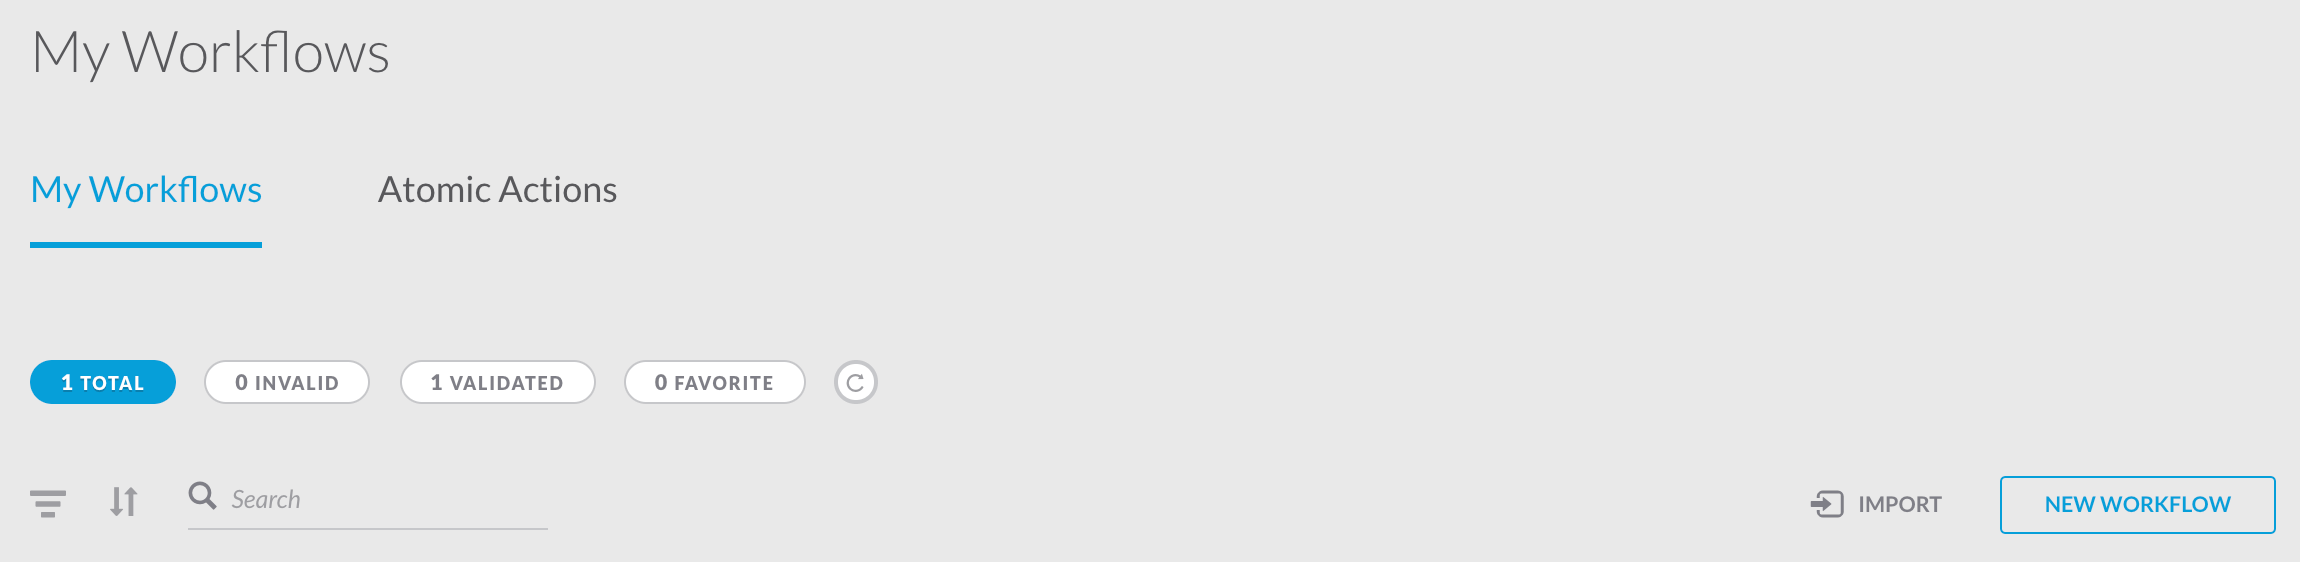
- Click on the empty palette to see all the properties of the workflow on the right side panel.
- Provide a display name and a description.
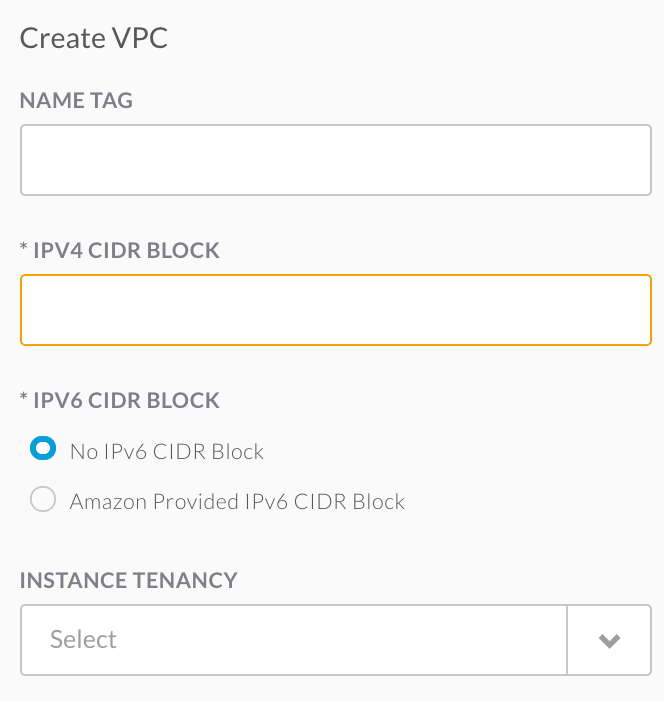
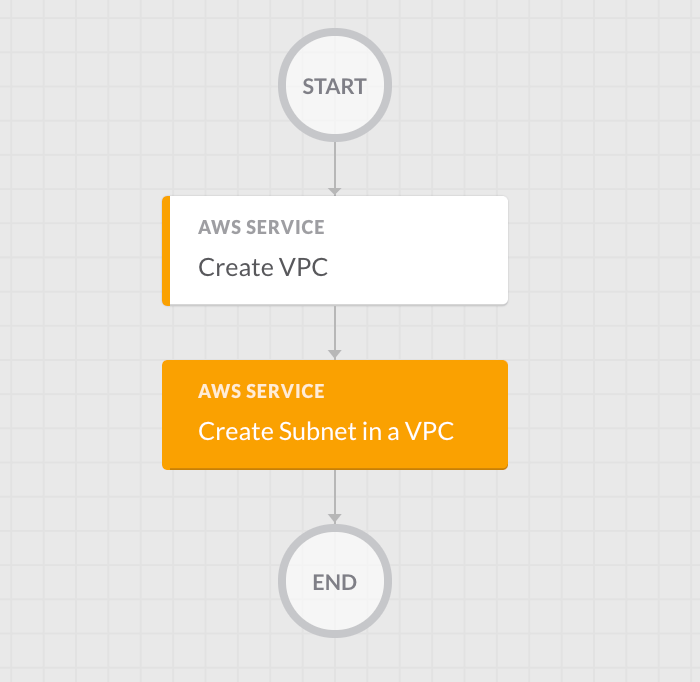
- Drag an action from the left side panel from any category desired. For an example, we will be using the “AWS Service” named “Create VPC”.
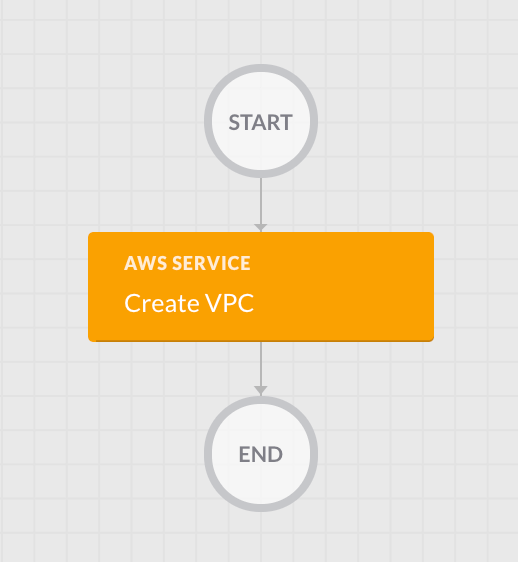
- Click on the action to see the properties required in the right side panel.
- Click the empty palette and add the AWS Endpoint to the target section under execute on a target.
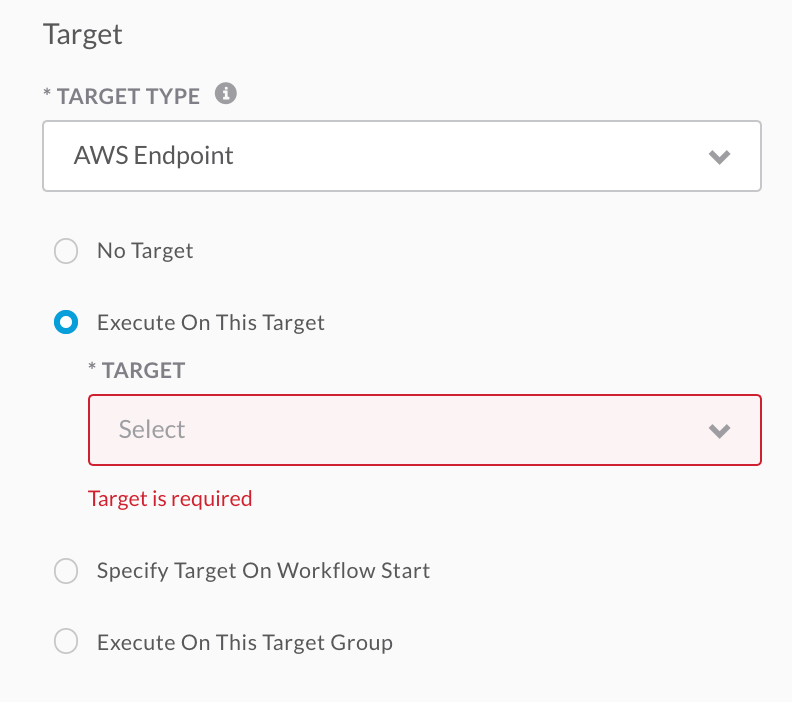
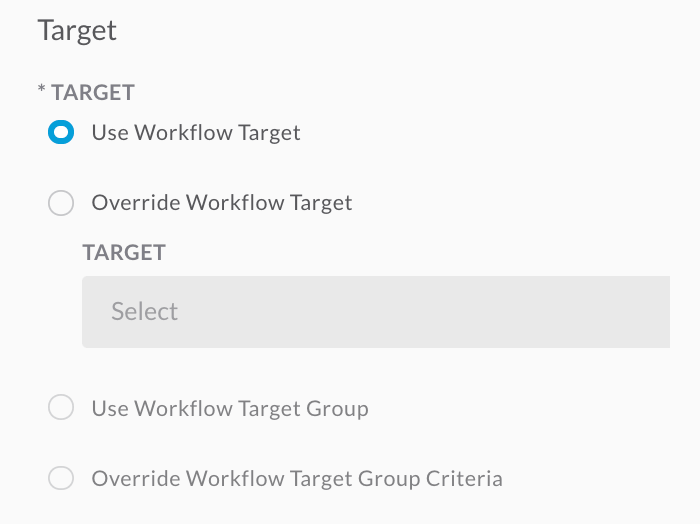
- Go back to the “Create VPC” action you will see that you can now select the target as use workflow target or you can override it.
- Provide a name tag and an IP address.
- Add a new action called “Create Subnet in a VPC”.
- Provide it a name, an IP CIDR Block, and an availability zone.

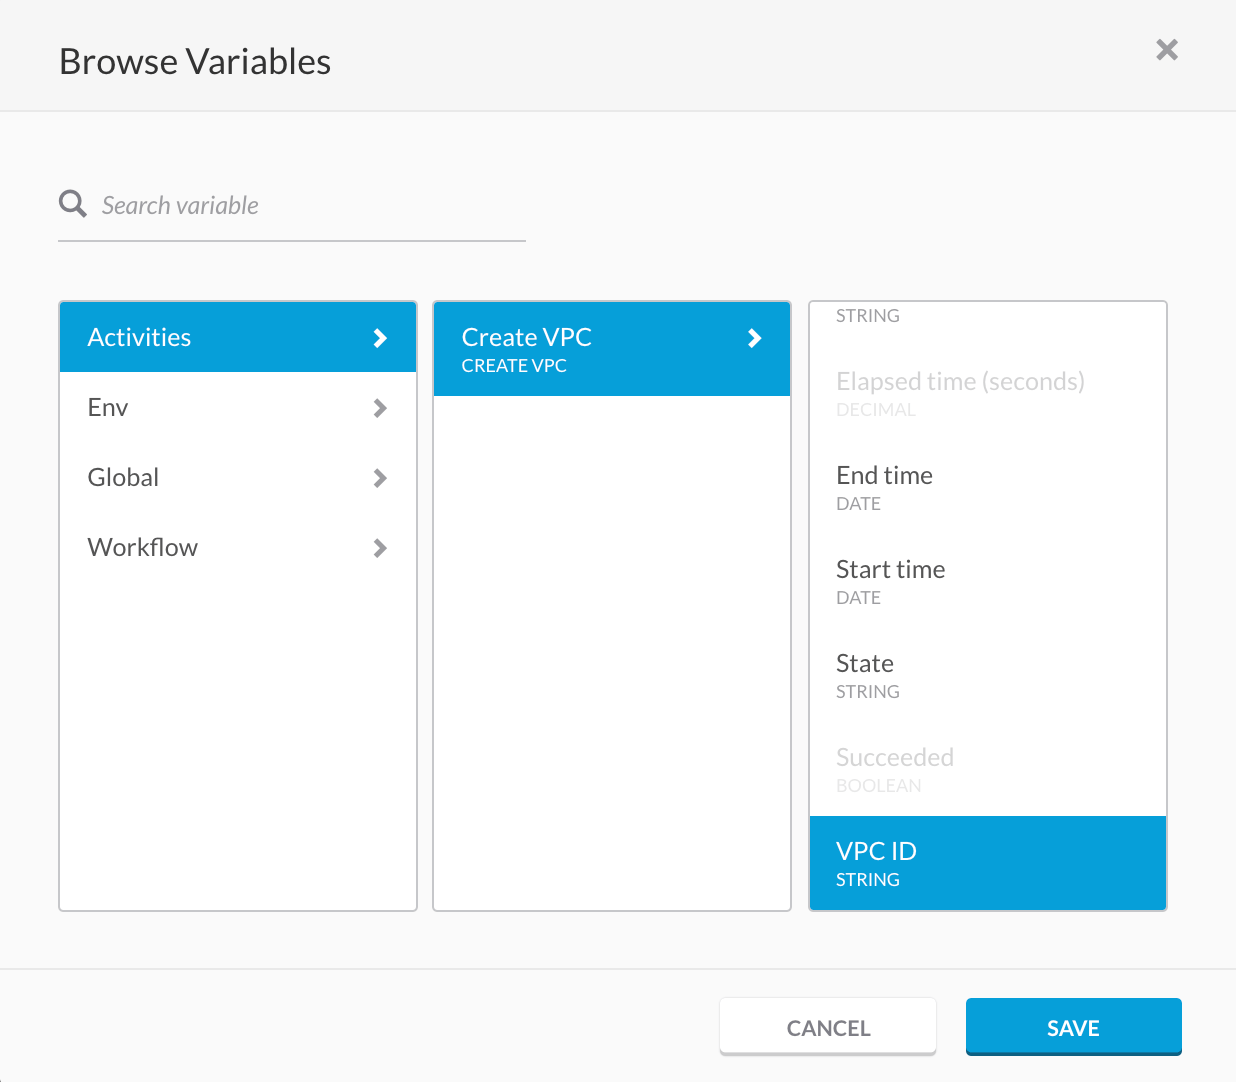
- Click the puzzle piece next to VPC ID and go to Activities, Create VPC, and then VPC ID to add the ID.
- The example workflow is now complete.

2.2. Runs
Runs allow you to see what actually occurred within your workflow. It lets you see every single step that happened so you can easily see where something went wrong.
2.2.1. How to See Runs
- In the left side panel below “Workflows” you will see a tab for “Runs”.

- Find runs for a specific workflow by going to the workflow and hitting the “View Runs” button.

- The runs page will show you the status of the run, the time it was started, the time it ended, the user it was started by, and the owner of the workflow.

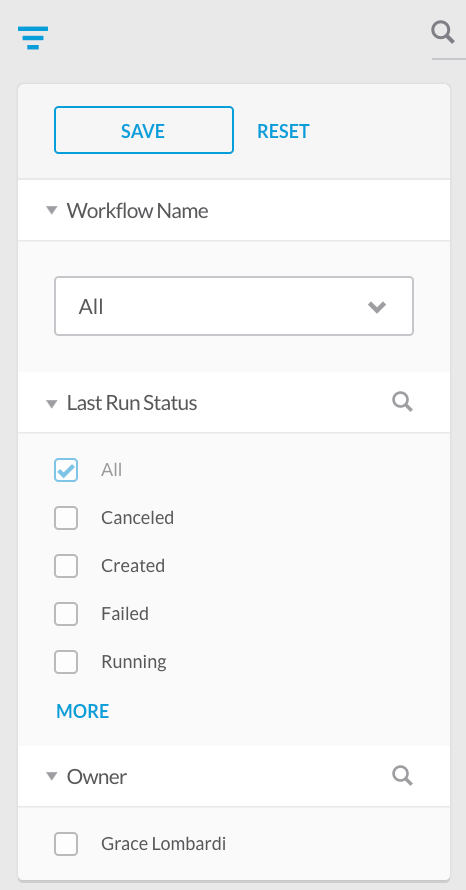
- Use the filter on the left to see specific results and workflows.
2.2.2. How to View a Failed Run
- Click on a workflow that failed it will take you to the workflow and put a green box around everything that ran successfully and a red box around what failed.
- Click on the red box and see what all the input and output was to find the error.

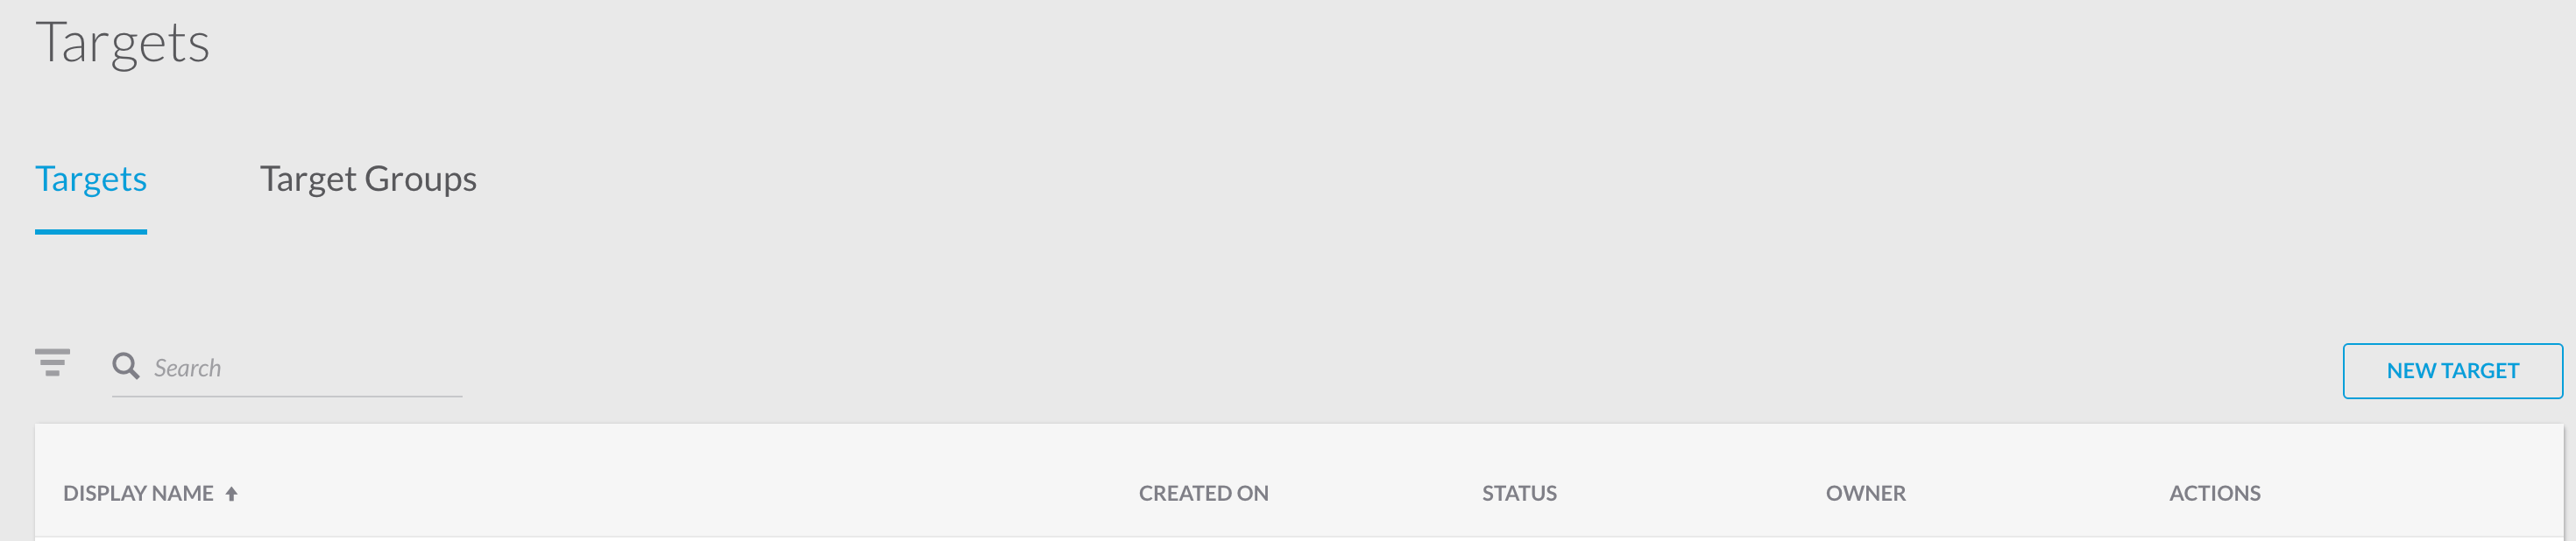
2.3. Targets
Targets specify where you want your actions or workflows to run. There are both single targets or target groups to choose from.
2.3.1. Creating Single Targets
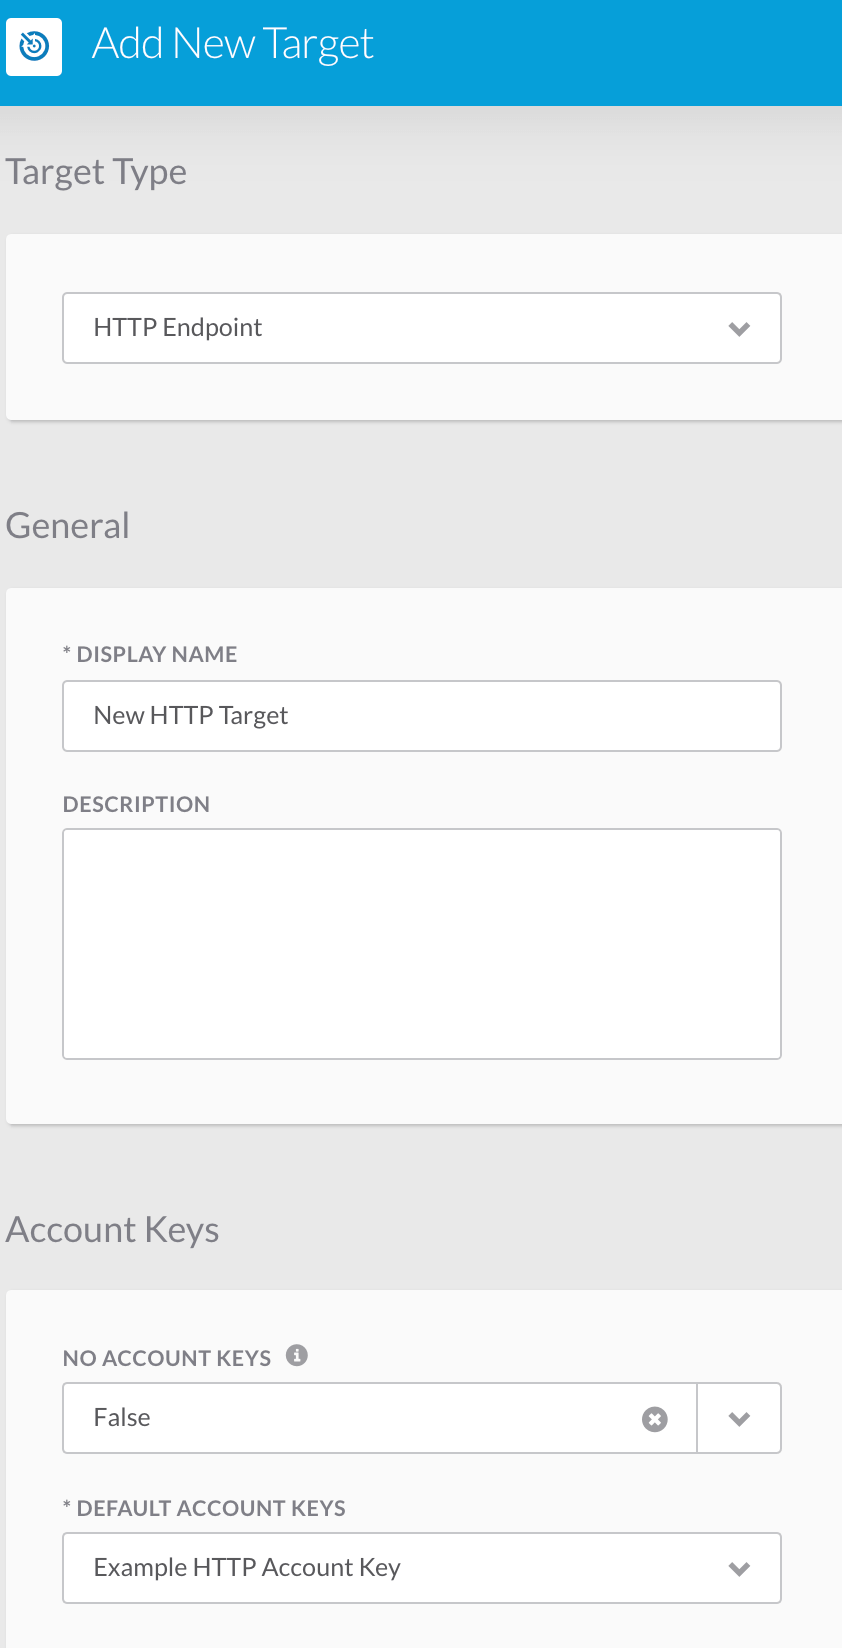
- Create a new single target click the “New Target” button.
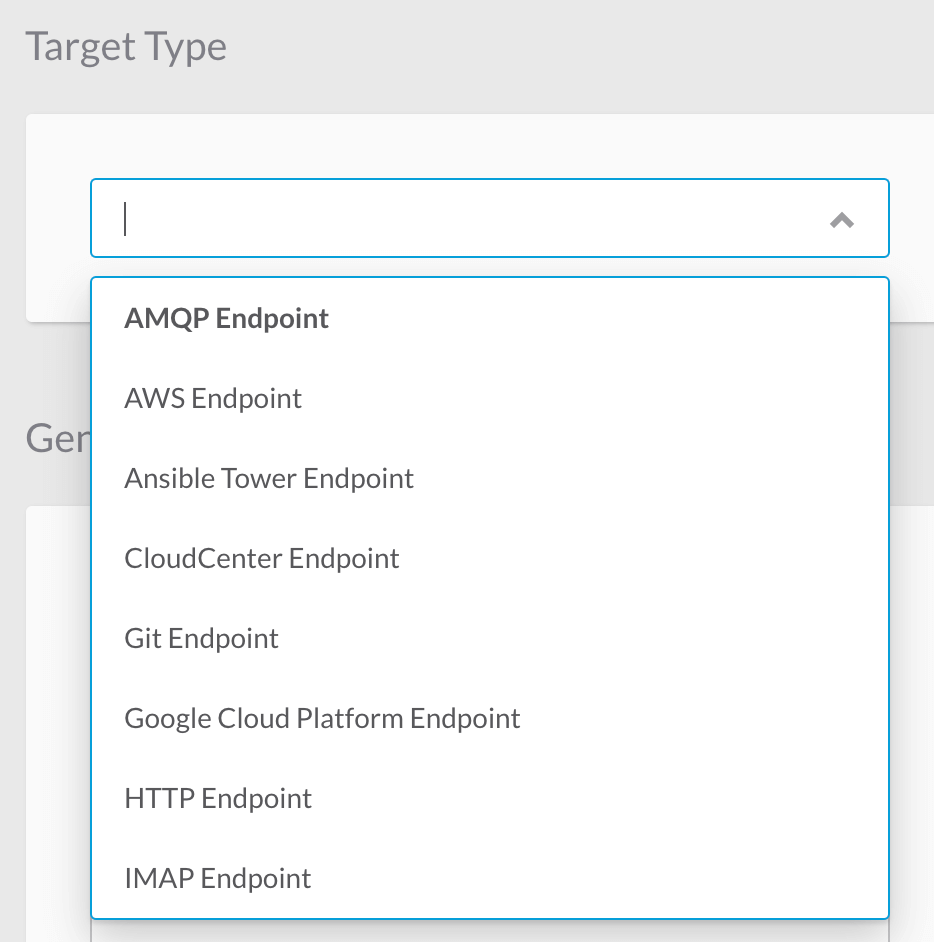
- Choose a target type.
Note
HTTP Endpoint is the most common target type.
- Create a display name and description.
- Choose to apply an account key or create a new one.
Note
Account keys are only required for actions that require authentication.
- Provide the HTTP protocol, host/ip address, the port, and the path.
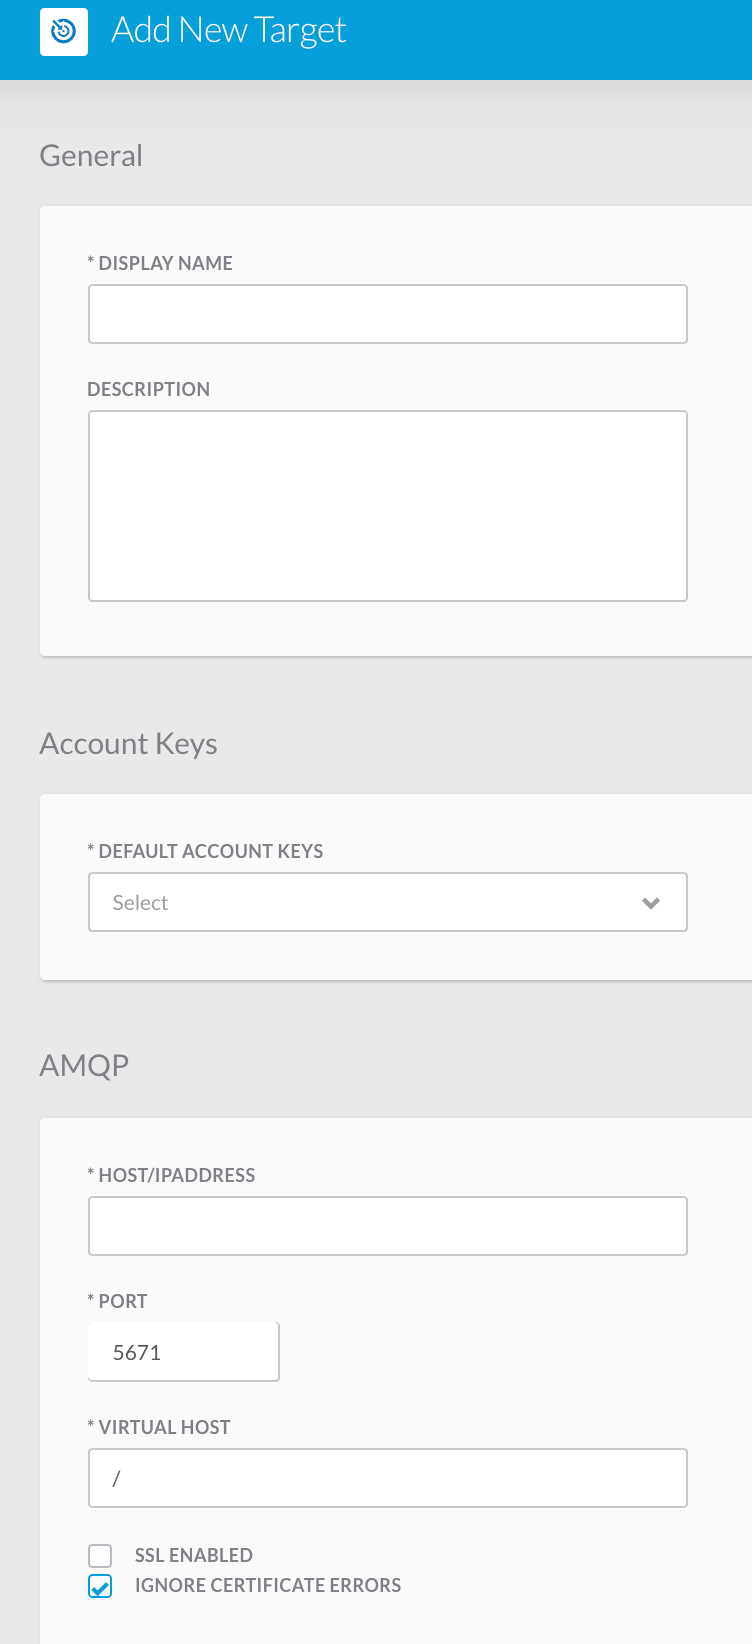
- Click the “Submit” button.
2.3.3. Creating Target Groups
TODO add info here
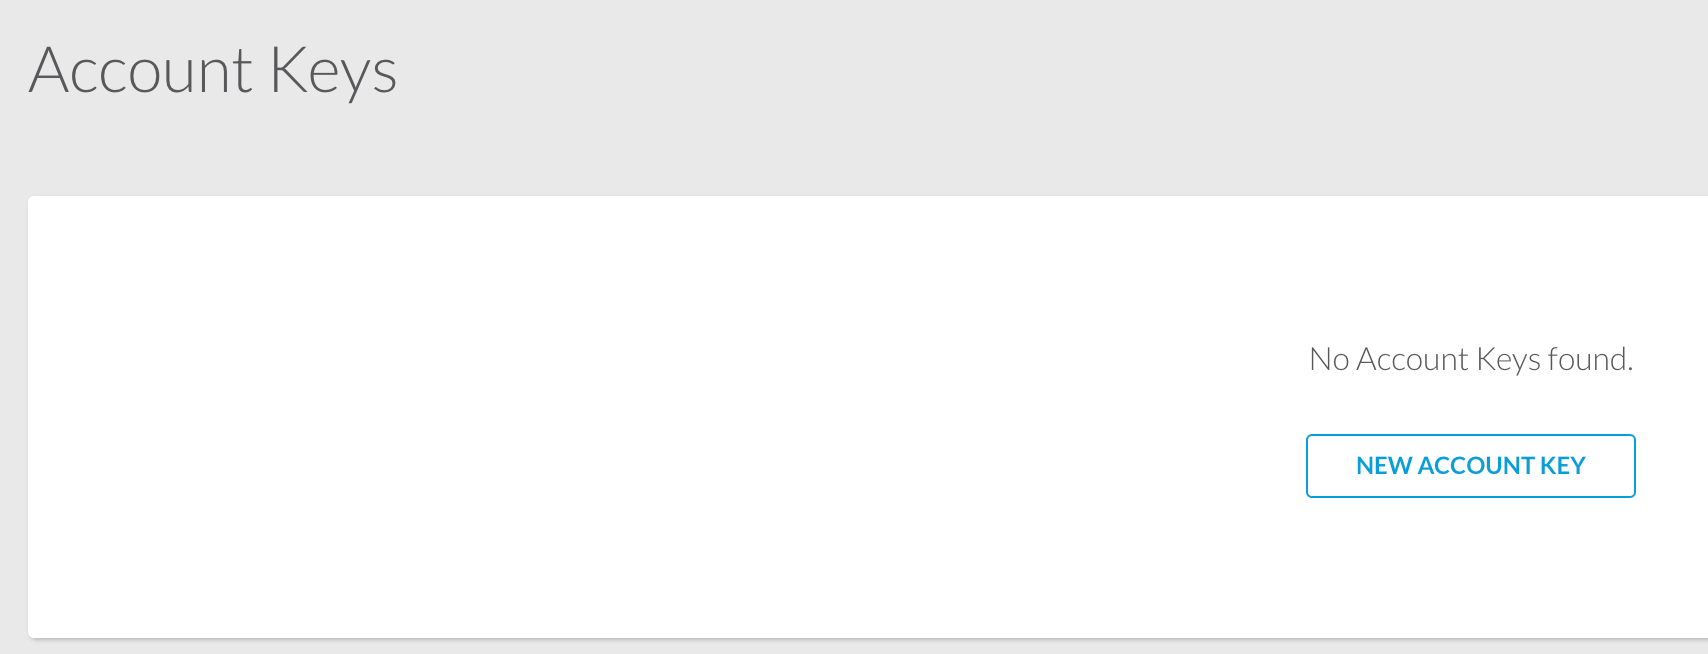
2.3.4. Account Keys
Account keys are used to authenticate to a target that is used in workflows. Account keys can be credentials like usernames and passwords or they can be certificates.
2.3.4.1. Creating a New Account Key
- Click on the “New Account Key” button.
- Choose the target account key type.
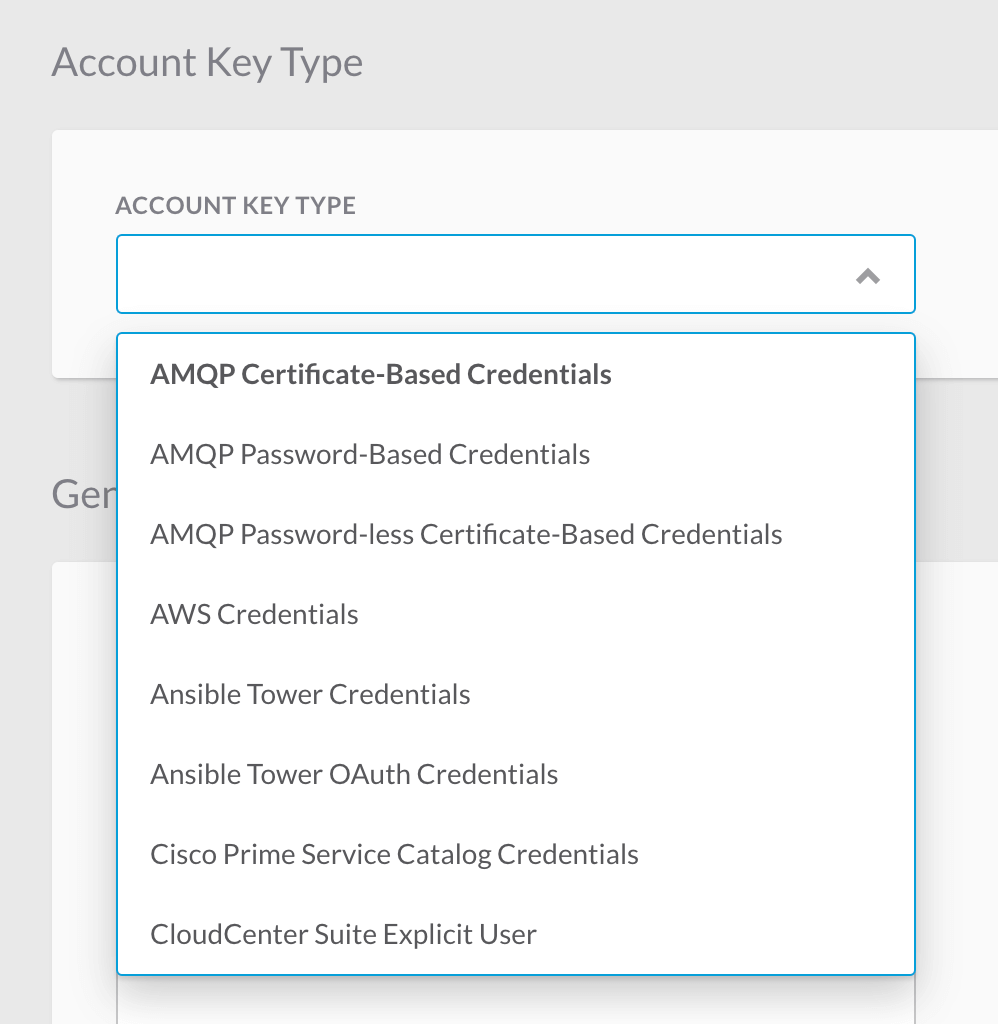
Note
The most common key type is HTTP Basic Authentication or HTTP Client Certificate Authentication. Most REST interfaces will use HTTP Basic Authentication.
2.3.4.2. Example of Creating New Account Keys
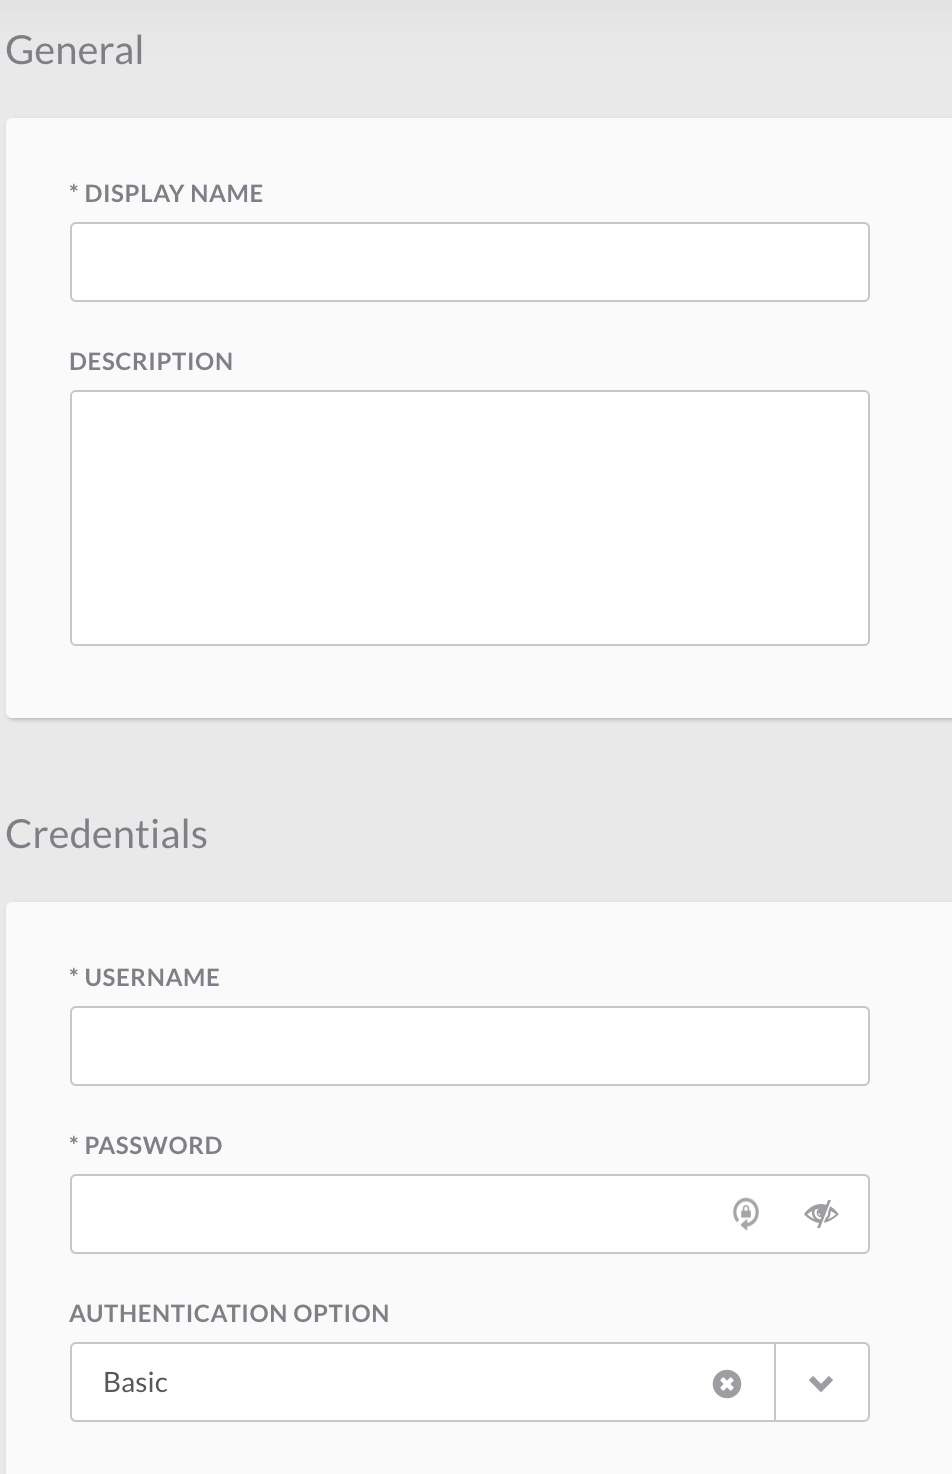
- To create a HTTP Basic Authentication Key you will provide a display name and a description. Then you will add the credentials and click the “Submit” button.
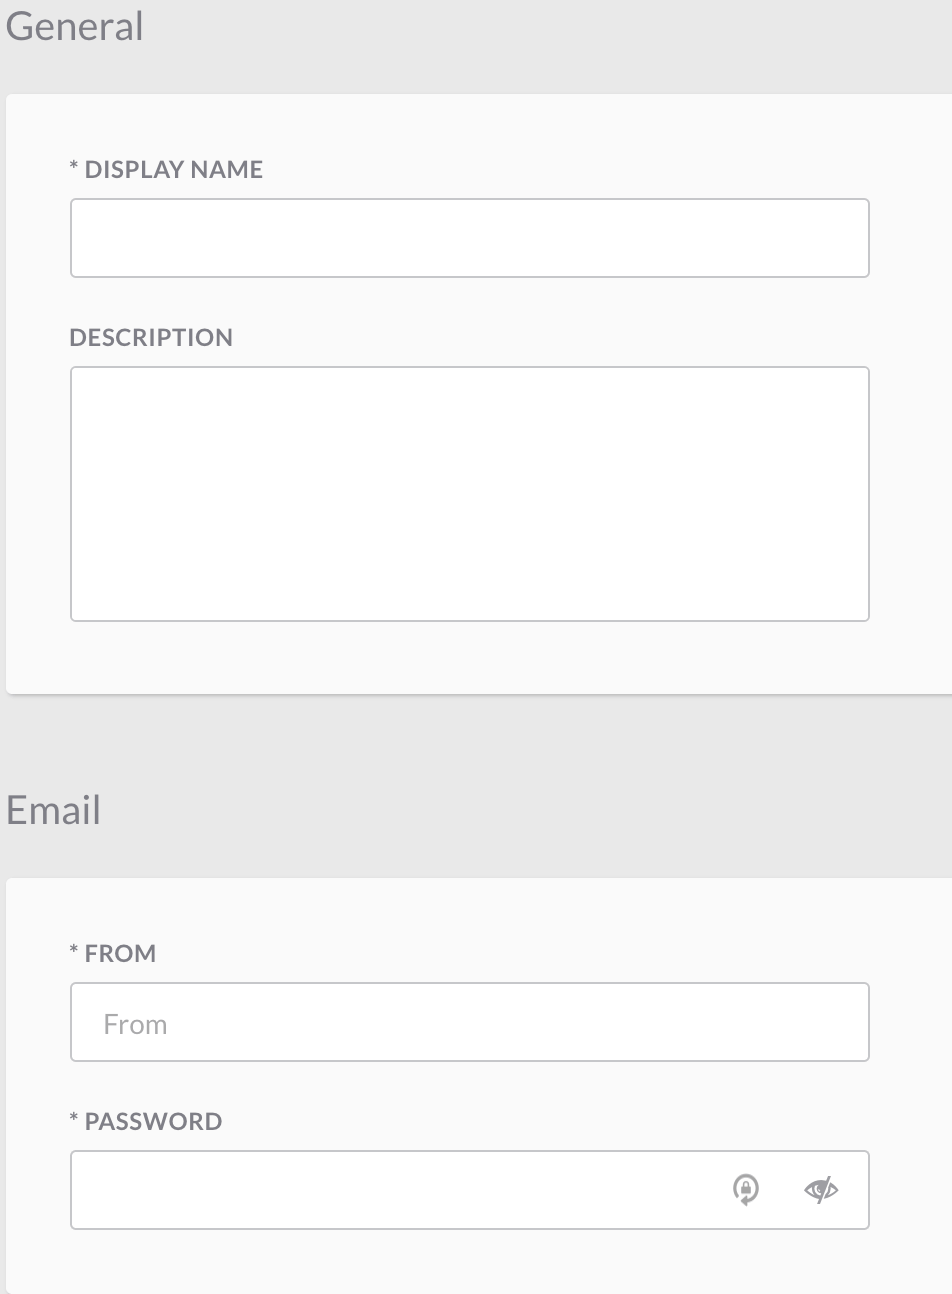
- To create an Email Credentials Key you will provide a display name and a description. Then you will provide a from email address and a password then click the “Submit” button.
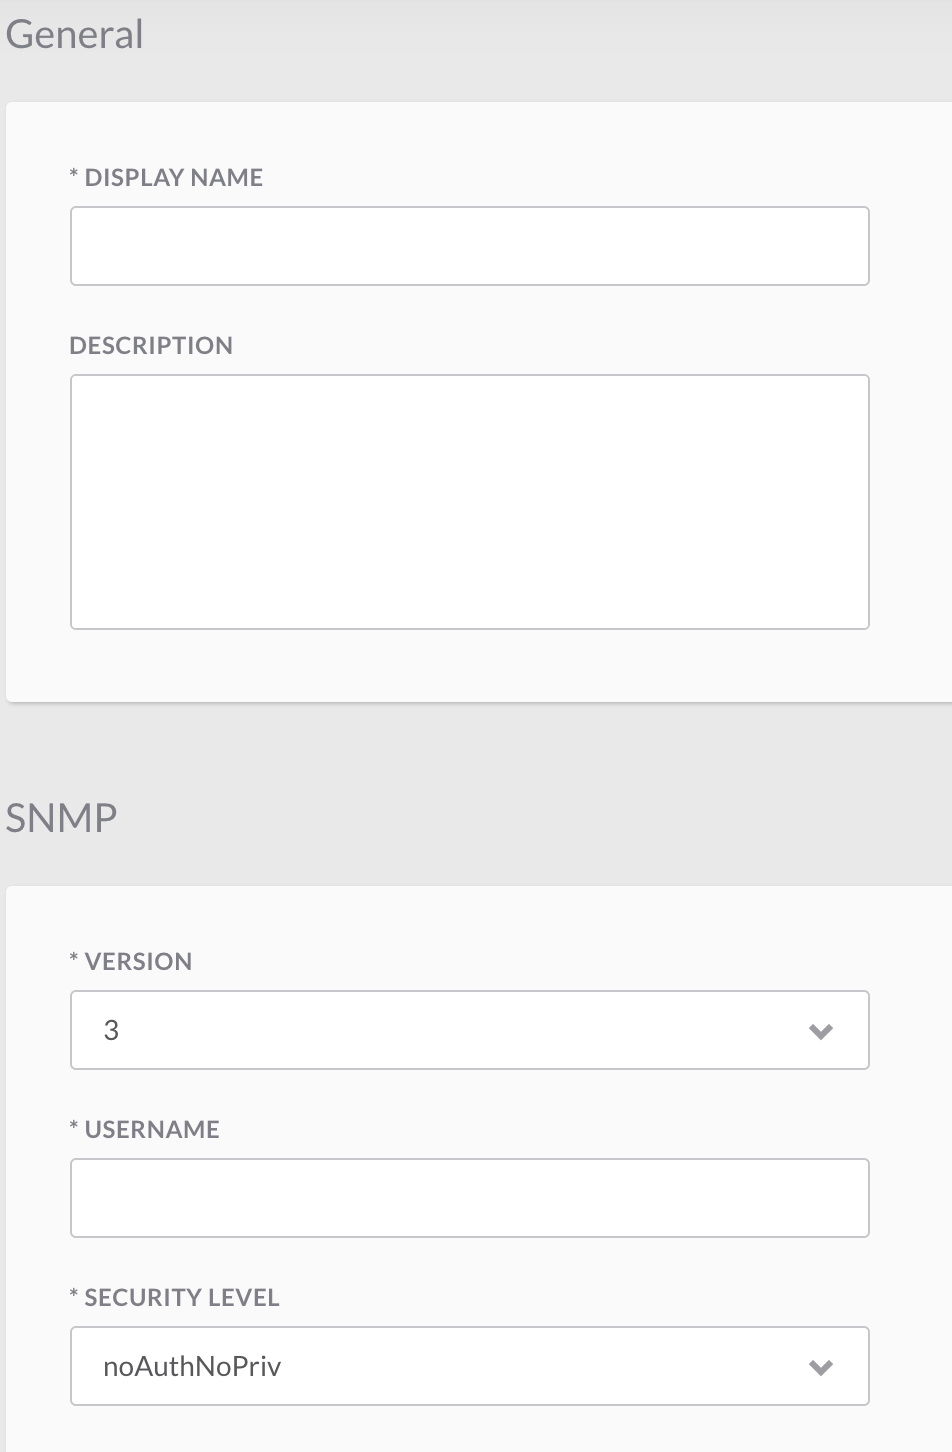
- To create a SNMP Credentials Key you will provide a display name and a description. Then you will provide a version number, a username, and a security level then click the “Submit” button.
2.3.4.3. Using an Account Key
- Under “Targets” you can choose a target and apply an account key you created to it.
2.4. Atomic Actions
Atomic actions are the building blocks of workflows.
2.4.1. Creating an Example Atomic Action
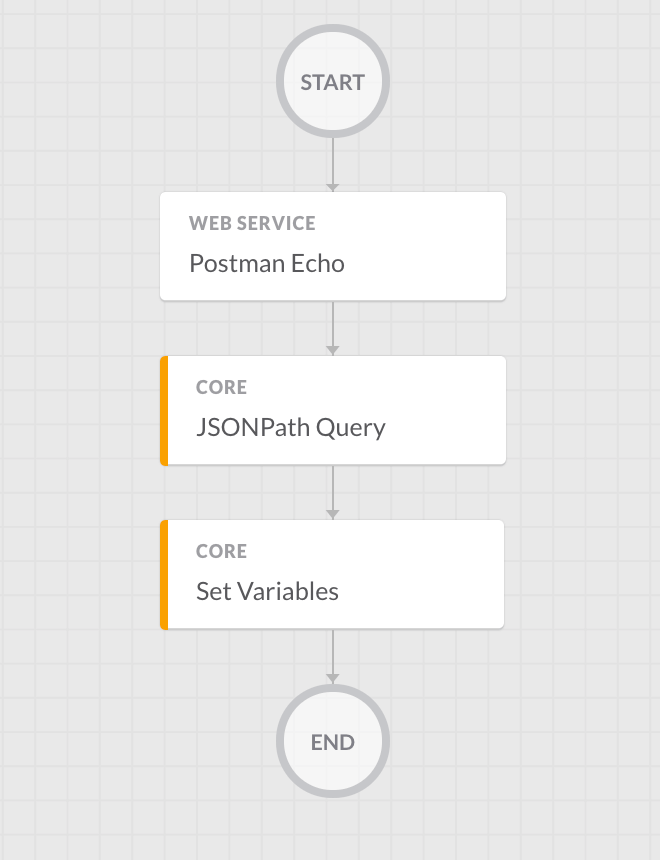
This atomic action will call out a postman echo and echo the response back to us.
2.4.1.1. Postman Echo
- Start by clicking the “New Workflow” button.
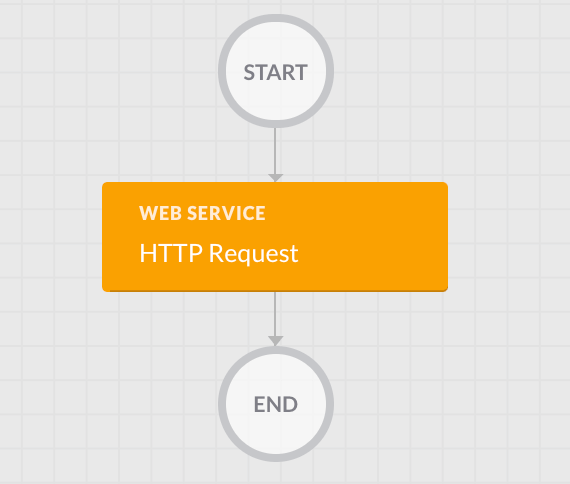
- Scroll down in the left side bar until you reach “Web Service” and add a “HTTP Request” to the workflow.
- Provide the HTTP Request the display name “Postman Echo” and provide a description.
- Provide the relative URL “/get”.
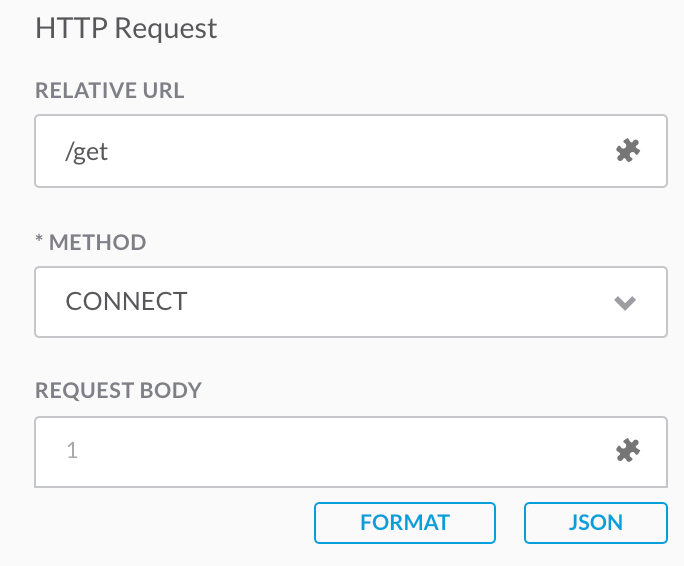
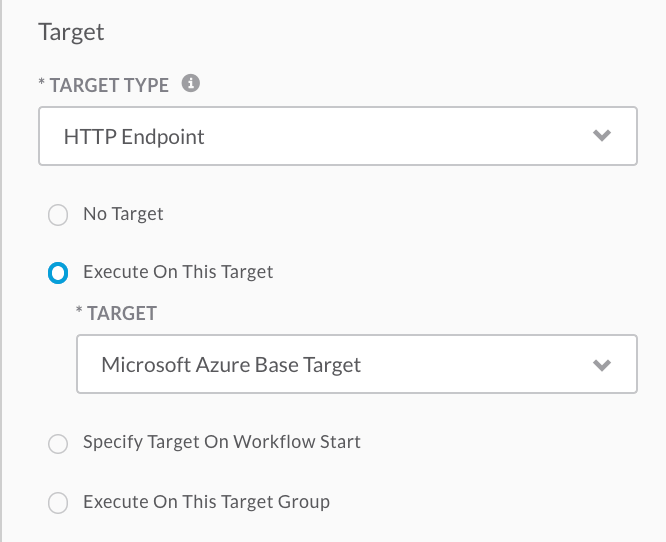
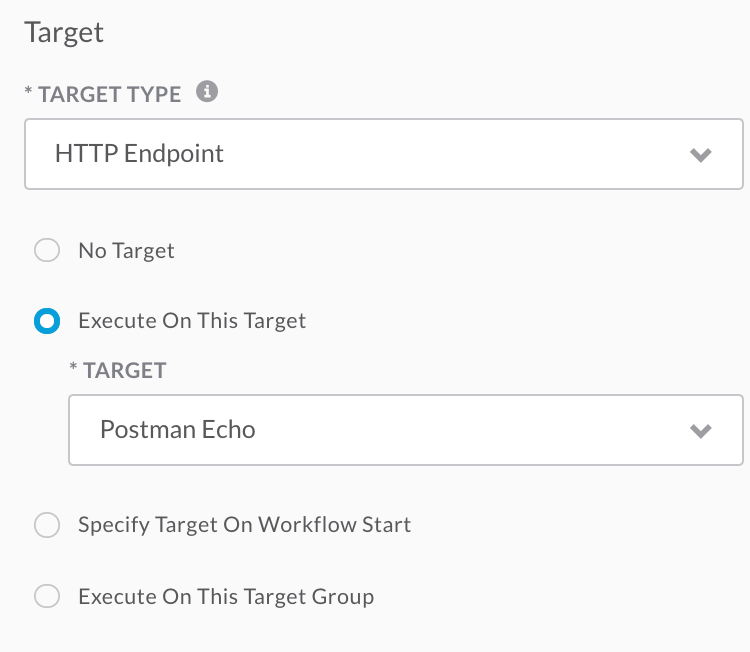
- Go to the target section and select execute on a target.
- Create a new target called “Postman Echo” and provide it the URL “postman-echo.com”.
- To test the request please change “/get” to “/get?test&test2” then validate the workflow and run it. In the response JSON you will be able to see “test”, “test2”, and some unnecessary data.
2.4.2. Removing Unnecessary JSON
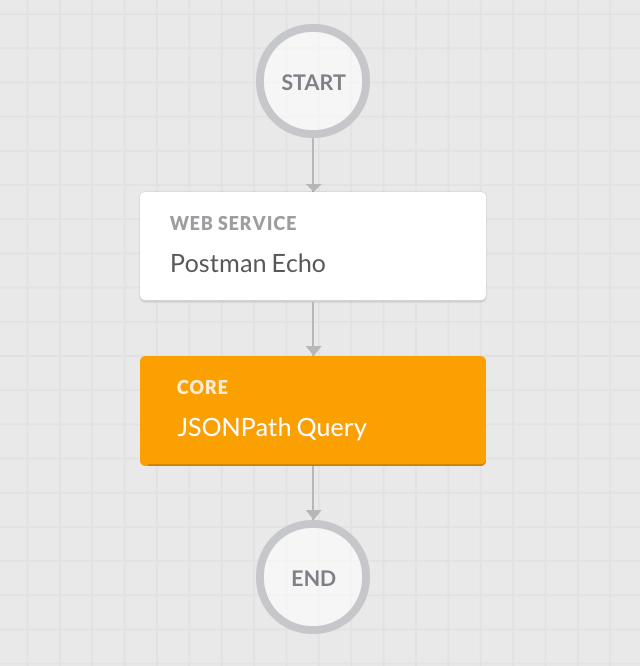
- To remove the extra unnecessary JSON add another action called “JSONPathQuery”. This allows you to pick which data you want to be returned back.
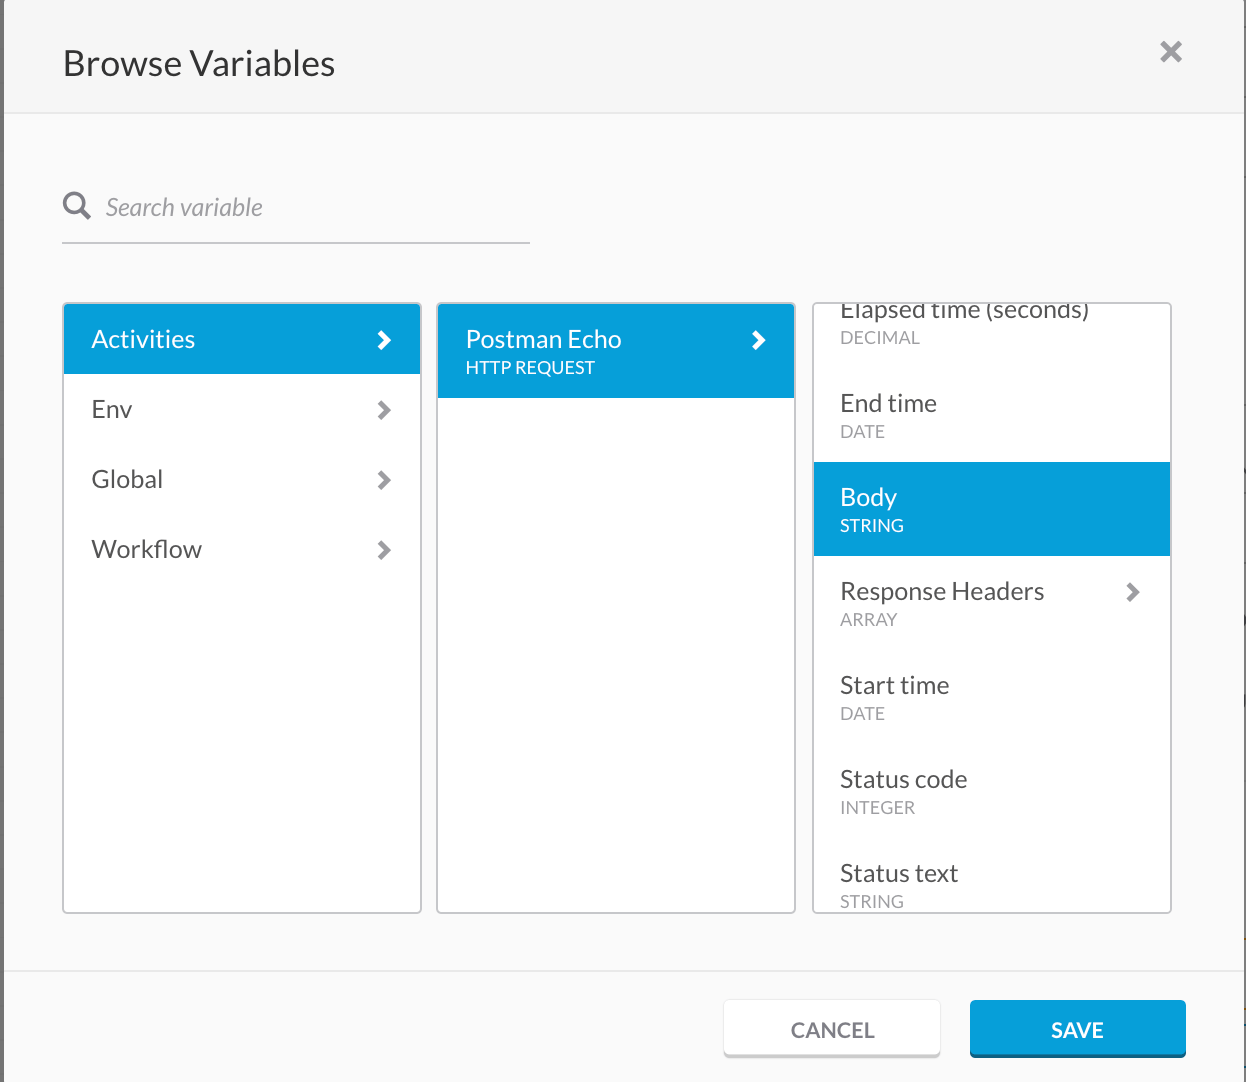
- In the right hand bar scroll down to JSON Query and click the puzzle piece to add a source JSON to query.
- Click activities then “Postman Echo” then choose the body.
- Add a JSON Path Query by providing “$.args” and the property name “args”.
- To test this action validate the workflow and run it. If you look at the response from the “JSONPathQuery” you will just see “test” and “test2”.
2.4.3. Making the Workflow Reusable
- Click an empty spot on the screen and then add a variable.
- Choose the data type string, add a display name of “Args”, choose the scope to be input, and make it required.

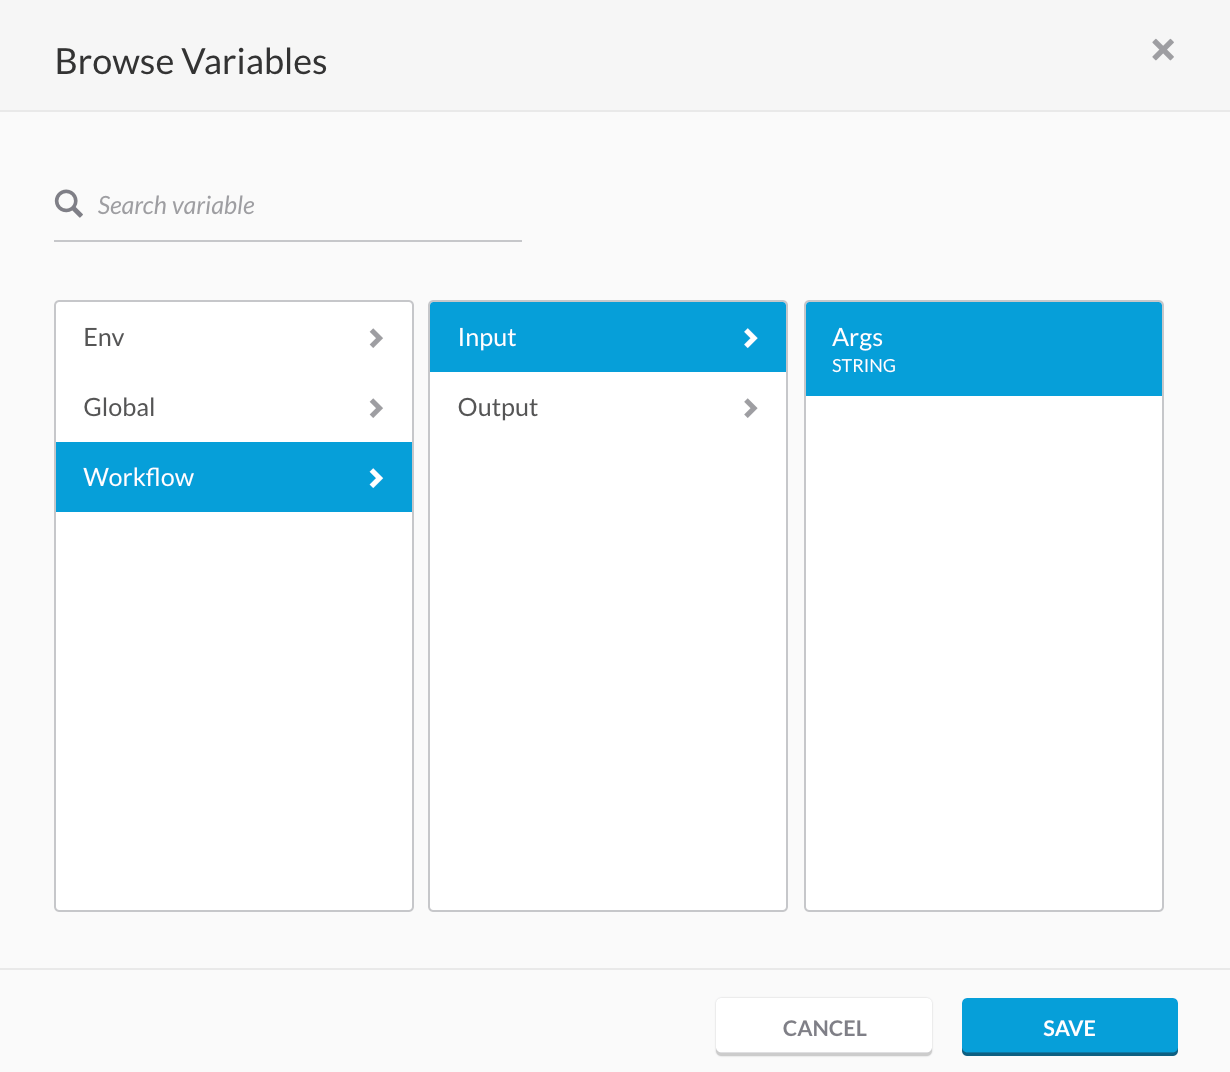
- Go back to the “Postman Echo” action and change the “/get?test&test2” by leaving the “/get?” and clicking the puzzle piece to select the variable you made.
- Set an output variable by adding a “Set Variables” action to the workflow.
- Go back to the main options for the workflow and add a new variable of type string called “OutArgs” and change the scope to output.
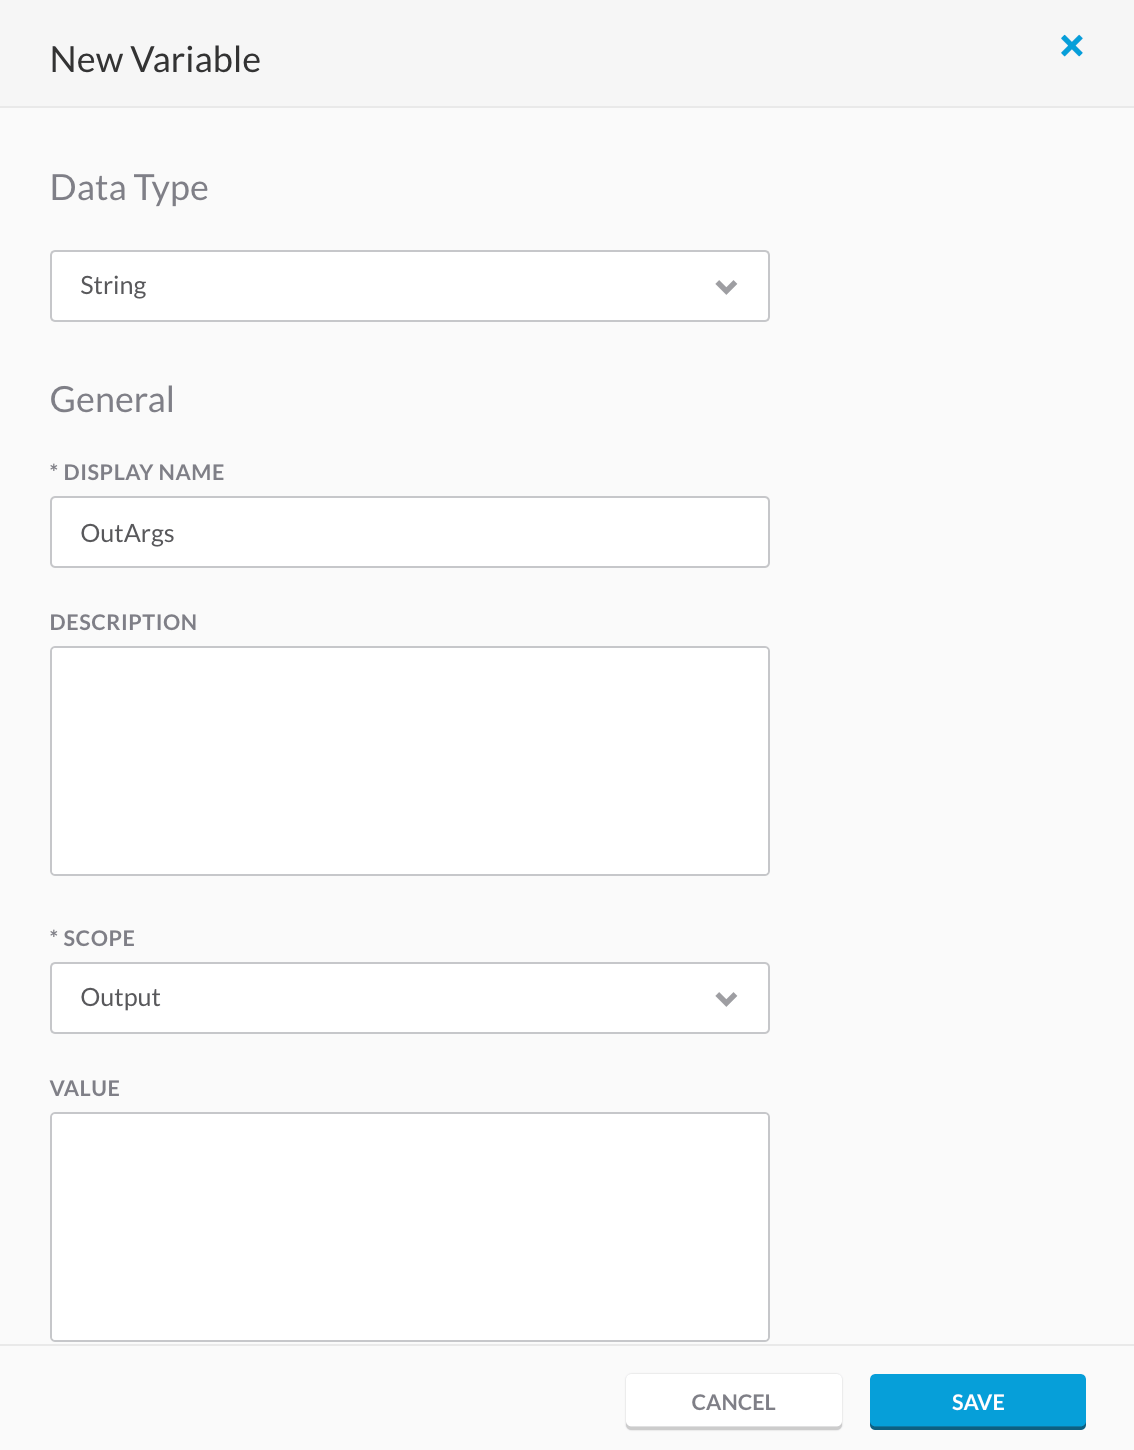
- Add the variable to the “Set Variables” action by clicking the puzzle piece and choosing “OutArgs” for the variable to update section and for the variable value new section select JSONPath Query then Jsonpath Queries then args.
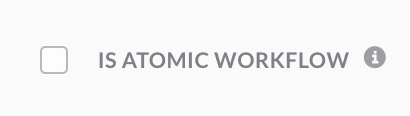
- Validate the workflow and select the “Is Atomic Workflow” button and give it a group name.
- Validate the workflow again and you can no longer click run.
- To use the “Postman Echo” workflow you can create a new workflow and now add the “Postman Echo” action.